Thursday, August 20, 2009

One of my favorites!

This is one of my favorite cards. It is also probably my most time consuming since everything was hand cut and embellished! This one uses the Jungle and Zoo Safari patterns from http://www.myscrapchick.com/.
All of the animals were pieced using pop dots to give it lots of dimension. Tricia Moore is the artist who designed these adorable animals and I just love her work!
On a personal note, we found out this week that my daughter is expecting another boy and we couldn't be more excited! He's due January 6. Life just gets better and better!
Hope y'all have had a wonderful summer! Hard to believe it's gone so quickly and fall will be here before we know it. Fall is one my most favorite seasons, so I hope to be able to feature some cute fall, Halloween and Thanksgiving projects here before too long.
Y'all take care and happy crafting! Hugs!
~ Cindy

Sunday, June 21, 2009

It's HOT y'all!!

I am not at all a summer person. The heat drives me inside and you would think I would get a whole lot of crafting done, but unfortunately that's not the case. I seem to find lots of others things that need to be attended to and I don't get to play!
But I do have a cute little project that can help to beat the heat...at least a little.


This cute little hand fan was made using two different myscrapchick patterns...the tree from the Monkey Business-Boys Only and our little logo chick. The base for the fan was cut out of chipboard to give it a little bit more stability than just cardstock. I covered it with patterned paper and added my cute paper piecings. The handle is also chipboard covered with paper, although you could use a craft stick...I just couldn't find my stash of those!


This next project is oh so cute...well, at least I think so! It's perfect for our upcoming July 4th holiday!
I washed four vegetable cans and covered them with cute red, white and blue patterned papers. I made a base from chipboard, which I also covered with patterned paper. Adhere the cans to the chipboard, leaving a gap between the two front and the two back cans so you can slip your napkins inside. I made a piecing using the Santa on Skates pattern from myscrapchick. I just modified him a bit to look more like Uncle Sam! I love the challenge of coming up with ways to the use patterns for more than their intended purpose! I adhered him to the front and all that's left to do is add your napkins and silverware! I used the fourth can in this picture as a flower vase, but it would be cute with little American flags too! Easy peasy!!
I hope you'll stop by www.myscrapchick.com and check out the darling paper piecing patterns! Sign up for the newsletter and receive a freebie every Friday!!!
Y'all stay cool! Hugs!! ~ Cindy
P.S.!! I received two awards from two lovely ladies too! I don't know how to add the cute little button to my blog (I'm woefully technologically deficient), but I wanted to thank them both so much for thinking of me!! I hope you'll visit their blogs as well. http://www.syrenasplace.com/ (my friend and sister scrap chick Syrena!) and http://creationsbyloubyloo.blogspot.com/ (Wendy who makes the cutest cards!) Thanks again ladies!

Tuesday, May 12, 2009

It's been a while...

Sorry for the blog drought. I haven't been crafting very much until just recently when I finally found the time to get a couple of things done. Sometimes you just gotta take a step back and come back refreshed.

The first project I have today is for our Mother's Day challenge at myscrapchick.com. We were to come up with something using the Glamour Girl patterns and here was my contribution.


I wanted to do something other than a card so I came up with the idea of making a little cosmetic holder. I found the little wooden box at Michael's for $1, covered it with patterned paper, adhered the paper piecings I'd made using Glamour Girl patterns and wrapped some satin ribbon around the handle finishing it off with a pretty bow. Easy peasy!
The next project I have for you has nothing to do with paper at all. It does, however, have everything to do with my newest obsession: vintage linens. I LOVE them!! Finding vintage sheets and pillowcases at thrift stores and yard sales has now become my latest quest. So here is my first attempt at a reusable grocery bag using a couple of vintage pillowcases.


This is the side gusset view:


Sorry for the less than stellar photos. The lighting is just bad. But I think the bag turned out cute! I don't think this will be the last bag I make either.
Now I have a really cute tip for you! Some of you may have heard of this before, but I hadn't until a friend told me just recently. She uses old sewing patterns as tissue paper in her gift bags and gift boxes. I just thought that was cutest idea, and they are super cheap at the thrift store...like 25 cents worth of cute goodness!
So there you have my latest crafting exploits. What have you been up to lately?

Tuesday, February 24, 2009

Cafe Mojo Fruity Chai Challenge for 2-23

This is my project for yesterday's Cafe Mojo Fruity Chai Challenge. The colors for this challenge are pink and orange, and I was fortunate enough to have some really pretty paper in these colors to make this card! I also had this beautiful textured flower given to me by a friend (thanks Jordi!) and I think it really finishes off this card. The background is the patterned paper cut into squares then matted onto textured cardstock. I used the large Baroque Motify from Stampin' Up! which I then heat embossed in metallic gold. The image is double matted. I used an SVG cutting file from myscrapchick to make the scalloped square for the bottom mat.

The inside is finished with the same patterned paper. Again, I used a stamp from the Baroque Motif set, heat embossed in gold metallic and punched using the scallop punch from Stampin' Up! The same image is used on the front of the box envelope.

I used a coordinating patterned paper to line the inside of the box envelope and attached a velcro dot as a closure.

I hope you like this pretty card! Thanks for stopping by!
Hugs!
Cindy

Friday, February 20, 2009

'Bout time...

Been a while since I posted a new project. I was hit this week with a yucky cold bug that kept me in a sneezing fit. I'm hoping I'm at the tail end of this thing now. Fortunately, I was still able to get a project or two made during that time, including one for a future challenge that I will show you later. I will share the ones that can at this time.
This first one is for the Mojo Mocha Friday challenge on Cafe Mojo Challenges. We were to use either ribbon or lace and for this one I chose ribbon. The image is one of the many vintage images that I have. I really love vintage! I paper toled the bird and flowers and added glitter to the top layer. The edges have been distressed with Tim Holtz Distress Ink.
On the inside I've added brads and corner embellishments and a pretty gold embossed stamped image, which is from Stampin' Up! I added the same image to the coordinating envelope.

My next card uses a darling chicken paper piecing from the myscrapchick Farm Friends collection. She has been chalked and popped on dimensionals. The scalloped circles are svg files from myscrapchick that I cut using my Cricut.

I have to warn you that the inside sentiment is incredibly corny! A very bad pun indeed! But I think it's still a cute card nonetheless :)

So there are my creations for the week. Thanks for stopping by and I hope you have a lovely weekend!

Hugs!

Cindy

Tuesday, February 10, 2009

Cafe Mojo Challenges

I recently became a design team member for Cafe Mojo Challenges on Paper Craft Planet, so I have two projects to show you that I made for the most recent challenges. The first was the papercraft your man challenge and I chose to make a layout using a photo of my 19 month old grandson.


I hand drew and cut the little trees, the swirls and the tear drop shapes. I added some doodling to the swirls and tear drops, and also around a couple of the circles. The quote is from the children's book Guess How Much I Love You. I did some distressing around the edges using my distressing tool and some Tim Holtz distressing ink.

The second is a card I made for a color challenge using pink and green. I apologize for the quality of the picture. It was taken at night so the light is horrible! I hope to soon make myself a light box so hopefully my pictures will turn out better.


I chose to go shabby chic on this one. I used gold embossing powder and my heat gun to add some pretty sheen to it. The flowers are little pink sheer ribbon flowers that I found ready made. I distressed the edges lightly with the Tim Holtz distressing ink. The sentiment in the center, which doesn't show very clearly, says "Cherish". I love the look of this one.
Hope everyone is having a great day! It's a bit cloudy here, but the temperatures have been lovely! Today should be around 70 degrees. I'm sure winter will remind us it's still not spring, but for the time being I'll just enjoy these warm days!
Y'all have a good one and thanks for stopping by!
Hugs ~ Cindy


Wednesday, January 28, 2009

Valentine's Day...just around the corner!

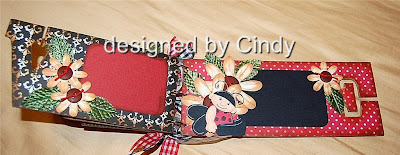
Hey y'all! I finally have a project to share with you. With Valentine's Day just around the corner, I've created this LOVE word album using a cutting file from myscrapchick. The little ladybugs, flowers and flourishes are also from myscrapchick, and were handcut from textured cardstock, embellished, pieced, and popped on dimensionals. Again, I used Tom Holtz distress ink by Ranger and several different patterned papers and ribbons by various companies that I have no idea who they are. They just came out of my stash! I hope you like it!


Thanks for stopping by!
~ Cindy

Tuesday, January 20, 2009

Trying some new things


I have two cards to show you today. The first is a Valentine's Day card I've made to give to my daughter. I have used some of the new printables from myscrapchick.com. They make creating so easy!

I've used a paper tole method on the image of the little girl to add dimension. The "love" embellishment was punched out with a scallop punch, and I've added stickles to the scalloped edges and Clear Glossy Accents by Ranger to the heart to make it shine. The ruffle is a wired ribbon. I simply pulled one of the wires to ruffle then glued it to a cardstock circle. Pop the scalloped printable up on a dimensional pop dot and you're done!


I always finish out the insides of my cards. I think it looks nicer that way. The sentiment on the front of the card and on the inside are computer generated. I've also made a matching envelope and adhered another printable to the front.


Another printable that I have punched out with the scallop punch finishes off the back of the envelope. I thought this one was particularly appropriate.


My next card is one that I made following a scrapbook sketch. You can easily adapt a scrapbook sketch to a 6x6 card by resizing and eliminating any elements that are not needed.


This card features some cute felt embellishments. I simply cut two different sized circles, stitched around each and added some pretty vintage buttons. The edges of the circles and the little star shaped flowers have been distressed with Tim Holtz Distress Ink by Ranger. The patterned paper is by My Mind's Eye. Again, the sentiment is computed generated.


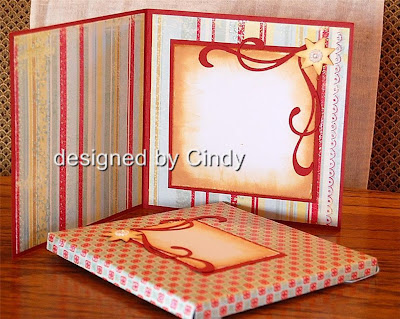
The inside features some of the same flourishes and the little flowers from the front of the card. I've also created a matching "box-elope". These are great for cards that feature more dimension than will comfortably fit in a regular envelope.

I hope you've had a great day today! Y'all stay warm!

Monday, January 12, 2009

Fairy Bears!!!


Here's my latest 12 x 12 two page layout that I just listed on Etsy. Again, it features paper piecings using patterns from myscrapchick.


And a couple of Valentine cards I also have listed on Etsy


I hope y'all had a great day!

Saturday, January 10, 2009

After spending several months following the blogs of others, I've decided to give it a go myself. I truly love crafts of all kinds, but paper holds a special attraction...okay, okay...addiction for me. Seems I am constantly on the lookout for ideas that are new and different, and fortunately for me I have a friend or two who are my enablers.

The first creation I want to share with you is this card that I have created for a swap. It features a darling little snowman made using a pattern from http://www.myscrapchick.com/. He has been hand cut from textured cardstock found at Hobby Lobby. I've chalked each piece and added details with a fine point marker and white gel roll pen. Dimension was achieved with foam pop dots. He is mounted on smooth cardstock that I embossed using my cuttlebug and the swirl embossing folder. The designer paper is from the All Seasons paper pack by The Paper Studio and the ribbon is from Michael's.


The sentiment inside is computer generated, and the envelope is handmade from coordinating paper then lined inside with the same designer paper. This card measures 6"x6".
Thank you for stopping by to visit me today! Have a great weekend!